In 2026, choosing an Led Aluminum Extrusion profile is no longer a simple size comparison. Lighting designers now balance heat control, optical quality, installation speed, and long-term appearance. A slim channel may look attractive in a showroom, yet fail when installed in a warm ceiling or narrow cabinet.
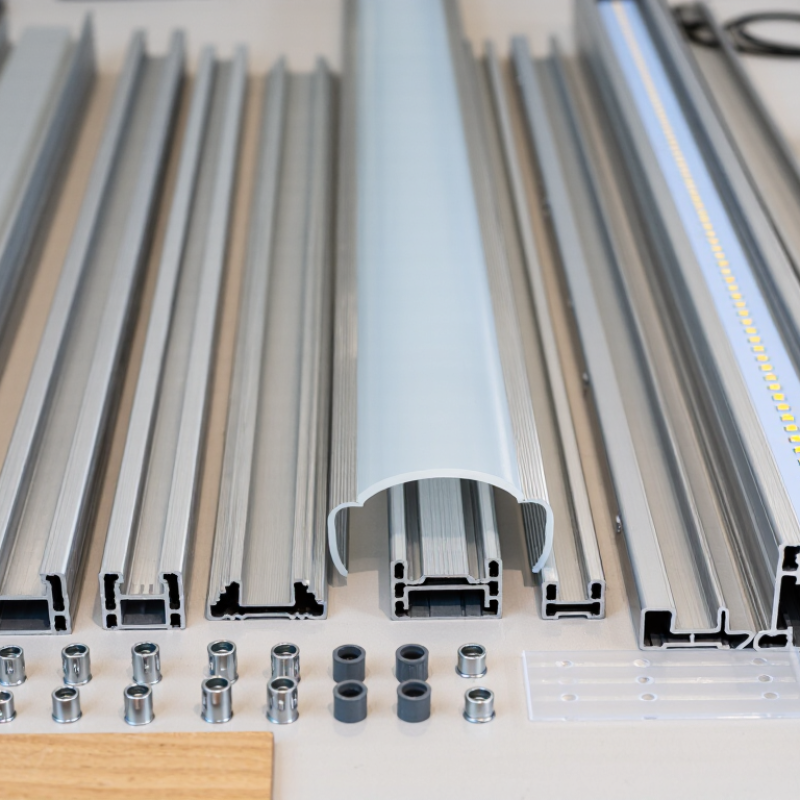
This guide focuses on practical selection decisions. It examines aluminum alloy quality, wall thickness, diffuser performance, LED strip compatibility, mounting methods, and surface finishes. Reliable profiles should support steady heat dissipation without sharp edges or inconsistent dimensions. The diffuser also matters. Frosted covers can reduce glare, but they may lower brightness and change the light’s color slightly.
Measure twice.
Real projects often reveal small problems. A profile can fit the strip but leave too little space for wiring. A recessed model may require stronger plasterwork support than expected. Waterproofing can also be misunderstood; a channel’s design does not automatically make the entire lighting system waterproof. The LED strip, end caps, connectors, and installation method must work together.
This introduction uses practical reasoning rather than attractive specifications alone. Product datasheets, supplier testing records, and installation conditions deserve careful review. Independent certifications can improve confidence, but they should never replace direct inspection. Even experienced buyers sometimes overlook diffuser aging or thermal changes after continuous operation.
There is no perfect profile.
The best choice depends on location, brightness needs, maintenance access, and budget. By comparing these factors before ordering, professionals and homeowners can reduce cutting waste, avoid uneven light lines, and create cleaner results. Mistakes may still happen, but thoughtful selection makes them easier to prevent and correct.
Before choosing an LED aluminum extrusion profile in 2026, define the lighting job precisely. Is it task lighting, display lighting, wayfinding, or soft architectural glow? Record the required brightness in lumens, not only watts. The International Energy Agency reports that lighting uses about 15% of global electricity. That makes efficient planning practical, not decorative. The U.S. Department of Energy also states that LED products can use at least 75% less energy than incandescent lighting. Still, efficiency alone cannot fix poor lighting.
Measure the installation area carefully. Note the strip width, total length, power density, color temperature, color-rendering index, and dimming method. A kitchen worktop may need crisp, high-CRI light, while a hotel corridor may require softer output. Check whether the profile will sit in a dry room, humid bathroom, dusty workshop, or exposed outdoor location. Water and heat change the specification. They are easy to underestimate.
Thermal planning deserves honest attention. Higher output creates more heat, even when LEDs are efficient. Choose an aluminum profile with enough surface area, and leave room for airflow when possible. Use a diffuser only after checking its light-loss rating. I often see designers select a narrow profile first, then force the LED strip into it. That reverses the process. The better approach is to define the visual result, operating conditions, and maintenance access before comparing profile dimensions. Some requirements will remain uncertain. Test a short sample section. It may reveal glare, color shifts, or unexpected shadows before installation becomes expensive.
How to Choose LED Aluminum Extrusion Profiles in 2026?
Choosing an LED aluminum profile starts with the mounting surface, not appearance. Surface-mounted profiles suit cabinets, shelves, and visible ceiling lines. They attach with clips or small screws and remain easy to service. Recessed profiles sit inside routed channels, creating a cleaner, built-in edge. They need accurate cutting and enough material around the groove. Corner profiles direct light across two surfaces, which works well under wall cabinets or inside display units. For floors or wet areas, select a stronger profile with a suitable sealing system and diffuser.
Mounting choice affects durability. Screws provide reliable support on wood and metal, while adhesive backing works best on smooth, dry surfaces. Do not trust adhesive alone on dusty walls or warm ceilings. Suspended profiles need rated cables, secure anchors, and balanced spacing. A diffuser should soften bright LED points without reducing light excessively. Check the strip width, heat dissipation, diffuser fit, and available profile length before ordering. I have seen attractive installations fail because the channel was too shallow. That mistake is easy to overlook.
Tips: Measure twice, then test one short section. Leave access for future strip replacement. Use a diffuser with the intended beam effect. For bathrooms or outdoor locations, verify the complete assembled system’s protection rating, not only the profile. Also inspect corners carefully; small gaps can expose uneven light and weaken the finished appearance.
Compare typical profile dimensions and mounting options for common LED installation scenarios.
Surface profiles are quick to install with clips or adhesive tape, recessed profiles provide a flush architectural finish, corner profiles direct light at approximately 45 degrees, suspended profiles work well for pendant fixtures, and plaster-in profiles create a nearly invisible trimless installation.
The dimensions shown are representative planning values in millimeters. Always verify the exact channel width, depth, diffuser, heat dissipation, and mounting hardware before installation.
Choosing an LED aluminum extrusion profile starts with accurate measurements. Match the channel width to the LED strip, not just the visible fixture. A strip measuring 10 millimeters needs enough side clearance for installation and wiring. Profile depth also affects the light line, diffuser position, and cooling area. Measure twice. Small gaps become obvious during final assembly.
Diffuser selection changes both appearance and performance. A frosted cover hides LED hotspots, while a clear cover delivers stronger output with less visual softness. For reading areas, choose controlled diffusion and comfortable brightness. For decorative lighting, a deeper profile can create a smoother glow. Avoid forcing a diffuser into a mismatched channel. It may warp, loosen, or crack over time.
Heat management deserves practical attention. Aluminum transfers heat away from the LEDs, but only when the strip contacts the profile properly. Clean the surface before applying the adhesive backing. Leave ventilation space around enclosed installations when possible. High-output strips need wider or deeper profiles, especially in long runs. One installation mistake I made was choosing a shallow channel for a bright strip. The light looked attractive at first, but the aluminum became noticeably warm after extended use. I would now check operating temperature under real conditions, not only on a workbench. Heat still matters. Also verify the diffuser material, mounting method, cable path, and available length before cutting. A profile can look suitable online and fail during installation.
Choosing an LED aluminum extrusion profile starts with the installation environment, not its appearance. Measure the available channel depth, width, and ceiling clearance. A profile that looks slim may not fit the LED strip, wiring, or diffuser together. Check whether the surface is wood, plaster, glass, or metal. Each material needs a different mounting method.
Moisture and heat also affect compatibility. Kitchens, bathrooms, and outdoor areas require suitable protection against water and dust. Review the complete lighting system’s protection rating, not only the aluminum profile. Aluminum helps transfer heat away from the LEDs, but airflow still matters. A sealed channel can become surprisingly warm. Leave room for connectors and avoid sharp bends in the strip. Small details matter.
Match the profile to the strip’s width, voltage, power, and bending direction. Confirm that the diffuser spreads light evenly without reducing brightness too much. For corners, stairs, or recessed furniture, test the angle before ordering full lengths. I have seen clean drawings fail because the diffuser could not be removed after installation. That mistake is expensive to correct. A short sample installation is worthwhile. It reveals shadows, weak adhesive contact, and unexpected wire paths. Recheck the measurements after the surface is prepared; walls are rarely as straight as plans suggest.
| Installation Condition | Recommended Profile Type | Typical Profile Dimensions | Compatible LED Strip Width | Protection Consideration | Key Compatibility Check |
|---|---|---|---|---|---|
| Indoor surface mounting Cabinets, shelves, walls and ceilings |
Standard surface-mounted aluminum channel with snap-in diffuser | Width: 15–25 mm Height: 8–15 mm |
Usually 8–12 mm | IP20 is generally suitable for dry indoor locations | Check strip width, PCB thickness, diffuser clearance and mounting clips |
| Recessed installation Furniture panels, ceilings and wall niches |
Recessed or trimless aluminum profile | Overall width: 15–30 mm Required cut-out depth: commonly 10–15 mm |
Usually 8–14 mm | Use a sealed design if the surrounding surface may be exposed to moisture | Measure the actual groove width and depth; allow space for wiring and end caps |
| Corner or cabinet-edge lighting 90-degree illumination between two surfaces |
45-degree angled aluminum profile | Face width: 16–25 mm Height: 16–25 mm |
Usually 8–12 mm | IP20 for dry interiors; sealed end caps are required for damp areas | Confirm viewing angle, corner geometry and connector bend radius |
| High-output or long-duration lighting Commercial displays, task lighting and continuous operation |
Deep aluminum profile with a large thermal contact area | Width: 20–50 mm Height: 15–30 mm |
Usually 10–20 mm | Use adequate ventilation and avoid covering the heat-sinking surfaces | Match the profile to LED power density; verify LED strip operating temperature |
| Wet or splash-prone locations Bathrooms, kitchens, covered outdoor areas and near sinks |
Aluminum profile designed for a sealed diffuser and gasketed end caps | Width: 16–30 mm Height: 10–20 mm |
Usually 8–14 mm | Select an assembly rated for the required IP level; IP65 protects against water jets, while IP67 supports temporary immersion under defined test conditions | The complete assembly must be rated—not only the aluminum channel |
| Outdoor exposed installation Facades, signs, terraces and exterior architectural details |
Heavy-duty sealed profile with UV-resistant diffuser and drainage provisions where appropriate | Width: 20–50 mm Height: 15–35 mm |
Usually 10–20 mm | Select the IP rating, UV resistance, corrosion resistance and temperature range for the site | Check expansion, fastener corrosion, cable glands and water-shedding orientation |
| Curved or circular surfaces Columns, arches, rounded furniture and signage |
Flexible silicone diffuser with a bendable aluminum profile, or segmented profile | Width: 12–25 mm Height: 8–18 mm |
Usually 6–12 mm | Choose a sealed flexible system when moisture or dust is present | Respect the manufacturer’s minimum bend radius and bending direction |
| Floor, stair or walk-over lighting Areas exposed to impact, abrasion or foot traffic |
Reinforced floor profile with a load-resistant diffuser or cover | Width: 20–40 mm Height: 15–25 mm |
Usually 8–14 mm | Use a diffuser rated for the expected mechanical load and slip conditions | Verify load rating, flush installation, surface traction and cable protection |
| Low-glare or dot-free lighting Direct-view applications and close viewing distances |
Deep profile with frosted or opal diffuser | Width: 20–35 mm Height: 15–30 mm |
Usually 8–14 mm | The diffuser reduces glare but can lower delivered light output | Use sufficient diffuser depth and select LED spacing suitable for the viewing distance |
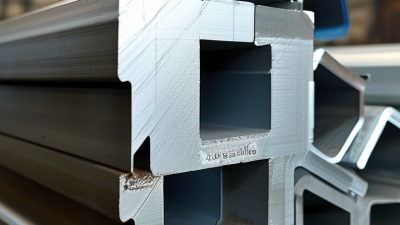
A reliable profile begins with consistent aluminum thickness, straight edges, and a clean anodized surface. In field installations, thin walls often bend during cutting or create uneven light lines. Check the alloy specification, finish adhesion, diffuser fit, and tolerance before ordering large quantities. A sample can look perfect, yet production pieces may vary. Test several pieces, not just one.
Safety requires more than a neat appearance. Confirm that the profile supports the LED strip’s heat output and matches the intended installation location. Review electrical compatibility, diffuser temperature limits, ingress protection, and applicable fire or building requirements. Rounded edges reduce handling injuries, while secure covers prevent accidental contact and dust entry. Requirements differ by region. Ask a qualified installer to verify them.
Tips: Measure the channel and strip together. Leave service access behind the diffuser. Choose corrosion-resistant finishes for humid rooms. Keep spare diffusers and mounting clips. Clean with a soft, dry cloth, not abrasive chemicals. I once underestimated cleaning time on a recessed ceiling project; maintenance became awkward and expensive. Design for replacement, not only installation. Check thermal performance after several hours, because a cool showroom sample proves very little.